

You’ve secured the client. The contract is signed, the deposit is in.
and you’re feeling confident. Then, on Tuesday, you realise you
didn’t ask for their brand fonts, you’re unsure who actually
approves the work, and there are two people named “Alex” on the
other end of the email thread. Welcome to freelancing.
Onboarding is the part of the process that no one teaches you.
mostly because it’s less exciting than landing the client.
But it’s also where most of the early project confusion begins.
Missing a single step here can lead to a chaotic mess by the third
week—one that could have been avoided with a simple question
in the first week.
Here’s a checklist I wish someone had given me when I was
working on my first “real” client instead of a friend’s cousin’s Etsy
shop.
Before You Send the Contract

A lot of the onboarding actually happens before it officially begins.
Waiting until the contract is signed to determine the project scope
means you’ve already fallen behind.
Confirm who the real decision-maker is.
It’s not always the first person who contacted you—it’s the one
who’s responsible for approving the final outcome. I once spent
two weeks communicating with a marketing coordinator on a logo
project, only to find out her boss didn’t like the direction we both
agreed on. Simply ask: “Who has the final say on this?” It’s a
quick question that takes about five seconds and can save you
from redoing work later.
Write down the project scope, even if it’s just a rough outline.
You don’t need a 12-page document for a $400 blog post. But
“three blog posts, 800-1000 words each, one revision round per
post” is different from “some blog content”, and the difference can
Be significant when the client asks for a fourth revision.
Set payment terms before you start the work, not after.
Decide on the deposit amount, how often you’ll send invoices,
and what happens if payments are delayed. Talk it through (or
write it down now, while the situation is still theoretical and
Nobody is frustrated yet.
The Onboarding Kickoff: What to
Actually Send
Once the contract is signed, send a welcome package.
It doesn’t need to be fancy—a simple email or a shared document
is fine. Here’s what mine typically includes:
- A short message welcoming them, thanking them, and
confirming the project scope and timeline - A questionnaire (more about this below)
- A request for any existing materials: brand guidelines, login
access, past work examples, and style references - Communication expectations: which channel you’ll use (email,
Slack, a project tool), and your usual response time - The project timeline with key milestones and key dates
Notice what is missing from this list: a wall of legal jargon or an
over-the-top form that feels like a DMV visit.
Keep it concise. Clients tend to avoid onboarding paperwork that
feels like homework.
The Client Questionnaire
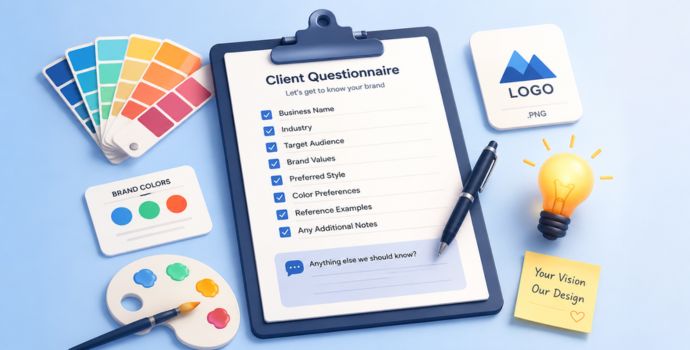
This is the most valuable document in your onboarding process
and is often the one that beginners skip or handle carelessly.
A solid questionnaire allows you to ask the questions that would
otherwise come up in a series of emails over the course of a few
weeks.
For a web designer, this might include:
- What is the main goal of this website?
(sell a product, generate leads, build credibility, something else) - Who is your ideal visitor, and what do you want them to do when
Do they land on the page? - Do you have brand guidelines, logo files, or colour codes
already?
If not, do you have 3-5 websites you like the look of? - Who else needs to review or approve the design?
- Is there a firm deadline linked to a launch, event, or campaign?
Change the details to match your niche, but the core purpose
remains the same: encourage the client to think and provide
answers before you start making assumptions.
Setting Up the Logistics
This part might not be glamorous, but skipping it can turn a quick
project into a three-week email-digging experience.
Pick one communication channel and use it consistently.
If half the conversation happens via email and the other half via a
Slack message that started halfway through the project,
something important could get missed. It doesn’t matter which
tool you choose—just pick one and let the client know that’s
where project discussions will take place.
Clarify your response time upfront.
“I check email in the morning and afternoon, so expect replies
within 24 hours on weekdays” sets expectations and helps avoid
clients who expect a response at 9pm and want an answer by
9:05.
Secure access early.
If you need a login to their CMS, ad account, or shared drive, ask
for it in the welcome email—don’t wait until you actually need it.
Delaying for IT approval or a forgotten password is a common
cause of project delays that can be avoided.
Define revision rounds clearly now.
How many are included, and what counts as a revision versus a
New request? A client who thinks “revisions” means unlimited
changes will create a very different working relationship than one
who understands it’s two structured rounds.
The First Check-In: Don’t Skip It
Around a week into the project, send a brief check-in—even if
Everything seems to be going well.
Something like, “Just wanted to confirm we’re aligned on direction.”
before I go further” takes just a couple of minutes and can help
avoid discovering too late that you built something completely
wrong.
This is more important than it might seem.
Fixing misunderstandings early on is simple and quick. However,
when misalignment happens later—like after 20 hours of work—it
becomes costly and awkward for everyone involved.
A Quick Real-World Example

Imagine you’re a freelance copywriter working with a new client, a
small skincare brand launching a new product line.
Your onboarding process might go like this:
Day 1: The contract is signed, the deposit is invoiced, and a
welcome email is sent with a questionnaire and a list of needed
assets.
Day 2–3: The client provides brand guidelines, three competitor
websites they like, and answers about the tone they want
(something “warm but not cutesy”).
Day 4: You confirm the content outline and get approval before
writing a single word.
Day 10: The first draft is delivered, along with a short note
highlighting two places where you made intentional stylistic
choices.
Day 12: Revision notes come back—mostly minor, since the tone
was already set during the outline stage.
Now compare that to skipping the questionnaire and jumping
straight into writing based on a 15-minute discovery call.
You might still end up somewhere close. But “close” after three
Drafts take much more time than “close” after just one.
The Part Frequently Overlooked:
Written Confirmation of All
Every verbal agreement—such as changes to the scope, extra
deliverables, or a shift in the deadline—should be followed up with
a two-line email summary.
For example, “Confirming we agreed to add the extra landing
page for $150, due next Friday.” It might feel overly formal at first.
but it stops feeling that way the first time a client insists they never
agreed to something you both discussed on a call three weeks
ago.
None of this has to feel corporate or stiff.
The goal of a good onboarding process is to let you stop worrying
about the logistics and start focusing on the actual work you’re
great at. It’s about building trust with the client, knowing they
I believe you’ve got the process under control. That trust, more
than the final deliverable, is often what leads to referrals for your
next client.